Assigning Exchange Roles in Microsoft Entra
To perform governance activities in your environment, the EasyLife 365 Mail Insiders application requires the Exchange Recipient Administrator role. This role grants the application administrative access to create, modify, and manage Exchange Online recipients within your organization.
EasyLife 365 Mail Insiders uses these permissions to create and manage the resources (e.g. Distribution Group, Shared Mailboxes, Room Mailboxes) in your organization.
While you should have already granted Graph permissions, this additional permission must now be explicitly assigned to the EasyLife 365 Mail Insiders service principal to ensure continued access to recipient management functions
Ensure you have previously consented to the EasyLife 365 Mail Insiders application and have a Global Admin account to complete these steps.
Recipient Management Members have administrative access to create or modify Exchange Online recipients within the Exchange Online organization.
Steps to Assign the Role
-
In the Azure portal, navigate to Roles and Administrators.
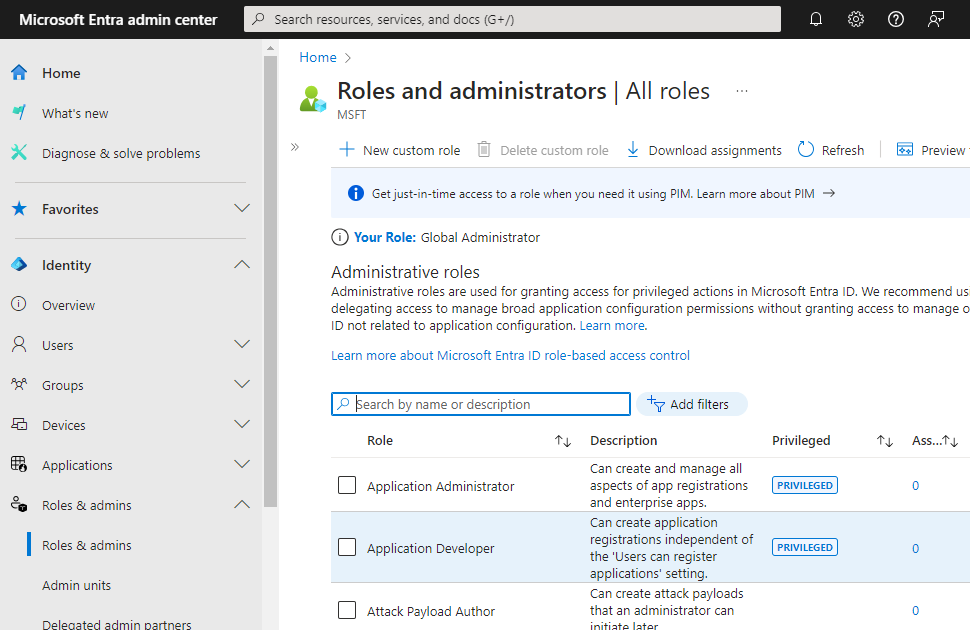
-
Search for the
Exchange Recipient Administratorrole that needs to be assigned to the application.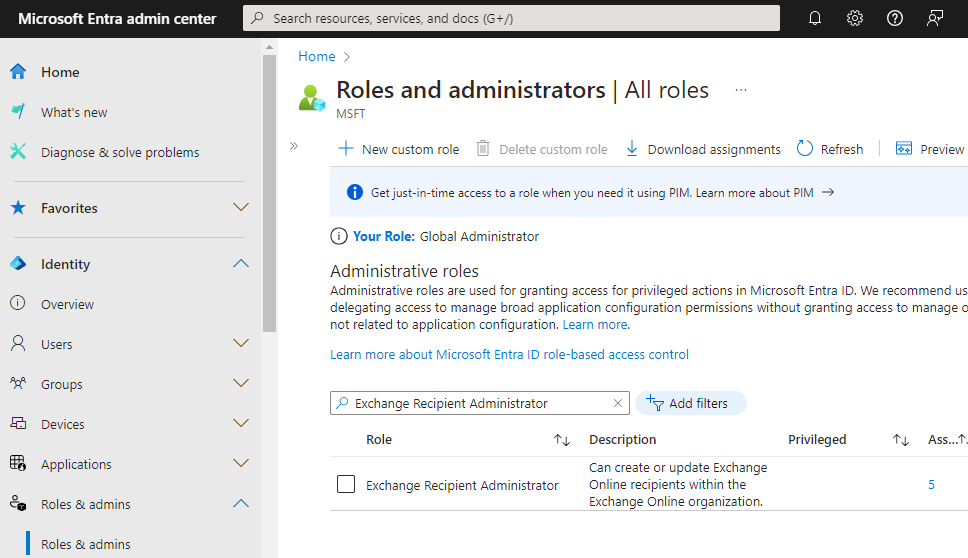
-
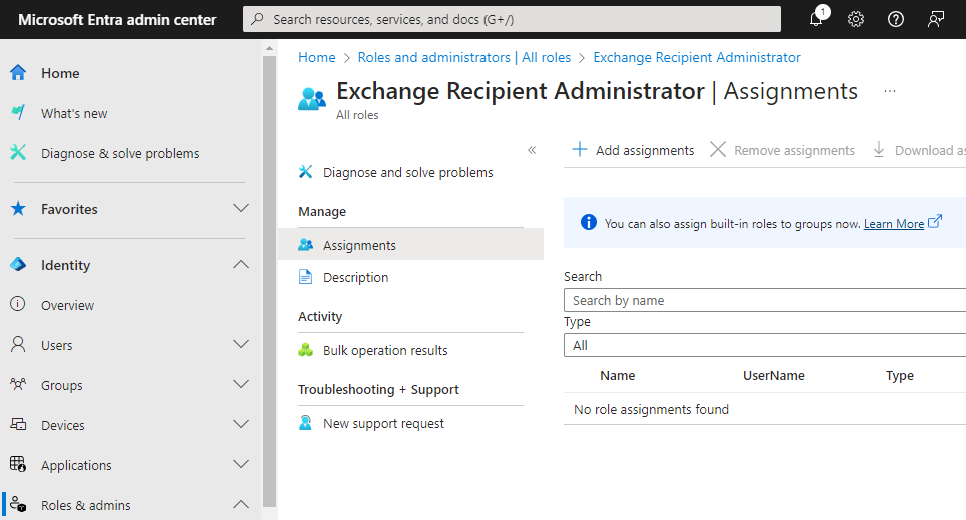
Click on the role name in the list to open the Assignments screen.
-
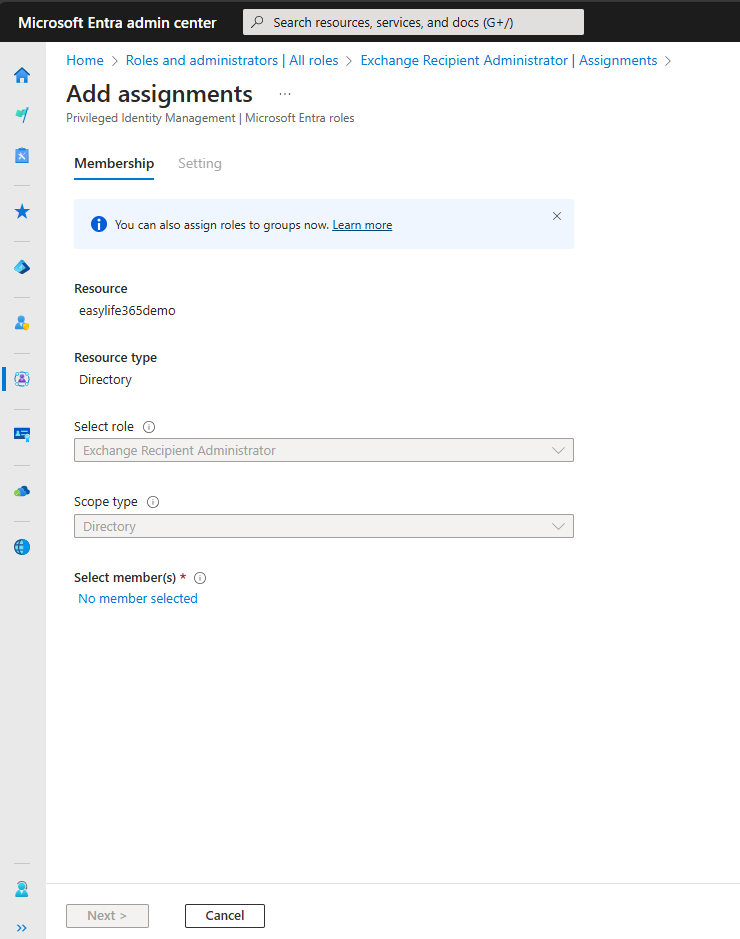
On the Assignments screen, select + Add assignments. This will take you to the Add assignments page. It may take a few seconds to load. Once loaded, you should see the Select member(s) section. Click on the No member selected link.
-
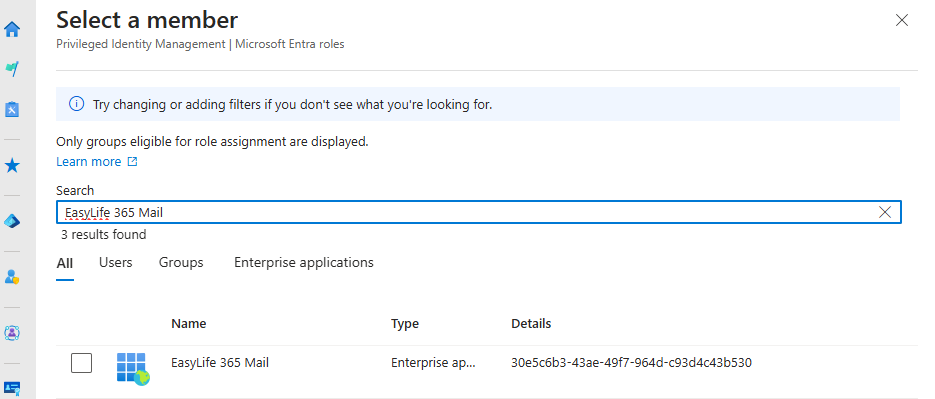
On the Select a member page, go to the Search box and type EasyLife 365 Mail Insiders. Select the EasyLife 365 Mail Insiders enterprise application from the list of suggestions and click Select at the bottom of the page.
-
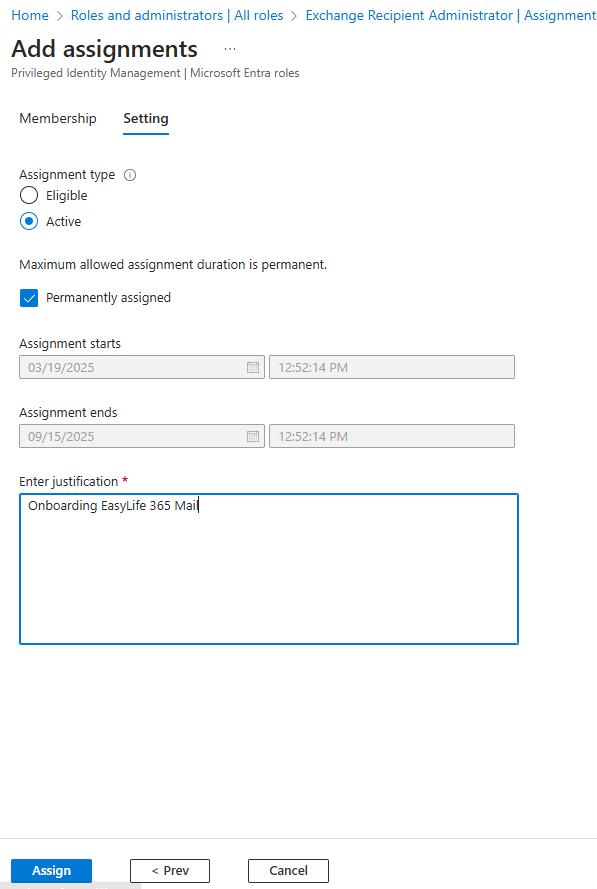
Once you have made your selection, you will be taken back to the Add assignments screen. Click on Next, and once on the Settings tab, ensure that that the assignment is active and supply a justification in the Enter justification field. This can be any relevant note for future reference.
After completing these steps, the permissions should be correctly assigned, and you can proceed with other tasks.