Guest Portals
With a guest portal, a new guest does not get Microsoft's invitation email. They get a link to a short journey that you design: they confirm their email address, read your welcome page and go through your steps, such as reading your guidelines or signing a non-disclosure agreement. Only then do they accept the invitation and get access.
You decide what each step shows, which documents the guest has to accept or sign, and who gets a copy of what they signed.
What your guests see
1. The invitation
The guest gets an email with a link to your portal, in your branding.
2. Confirming their email address
The portal sends the guest a one-time code to make sure the invitation reached the right person.
3. Your steps
After your welcome page, the guest goes through your steps in order. A step can show a document to read, to accept, or to sign. To sign, the guest types their name and can draw their signature.
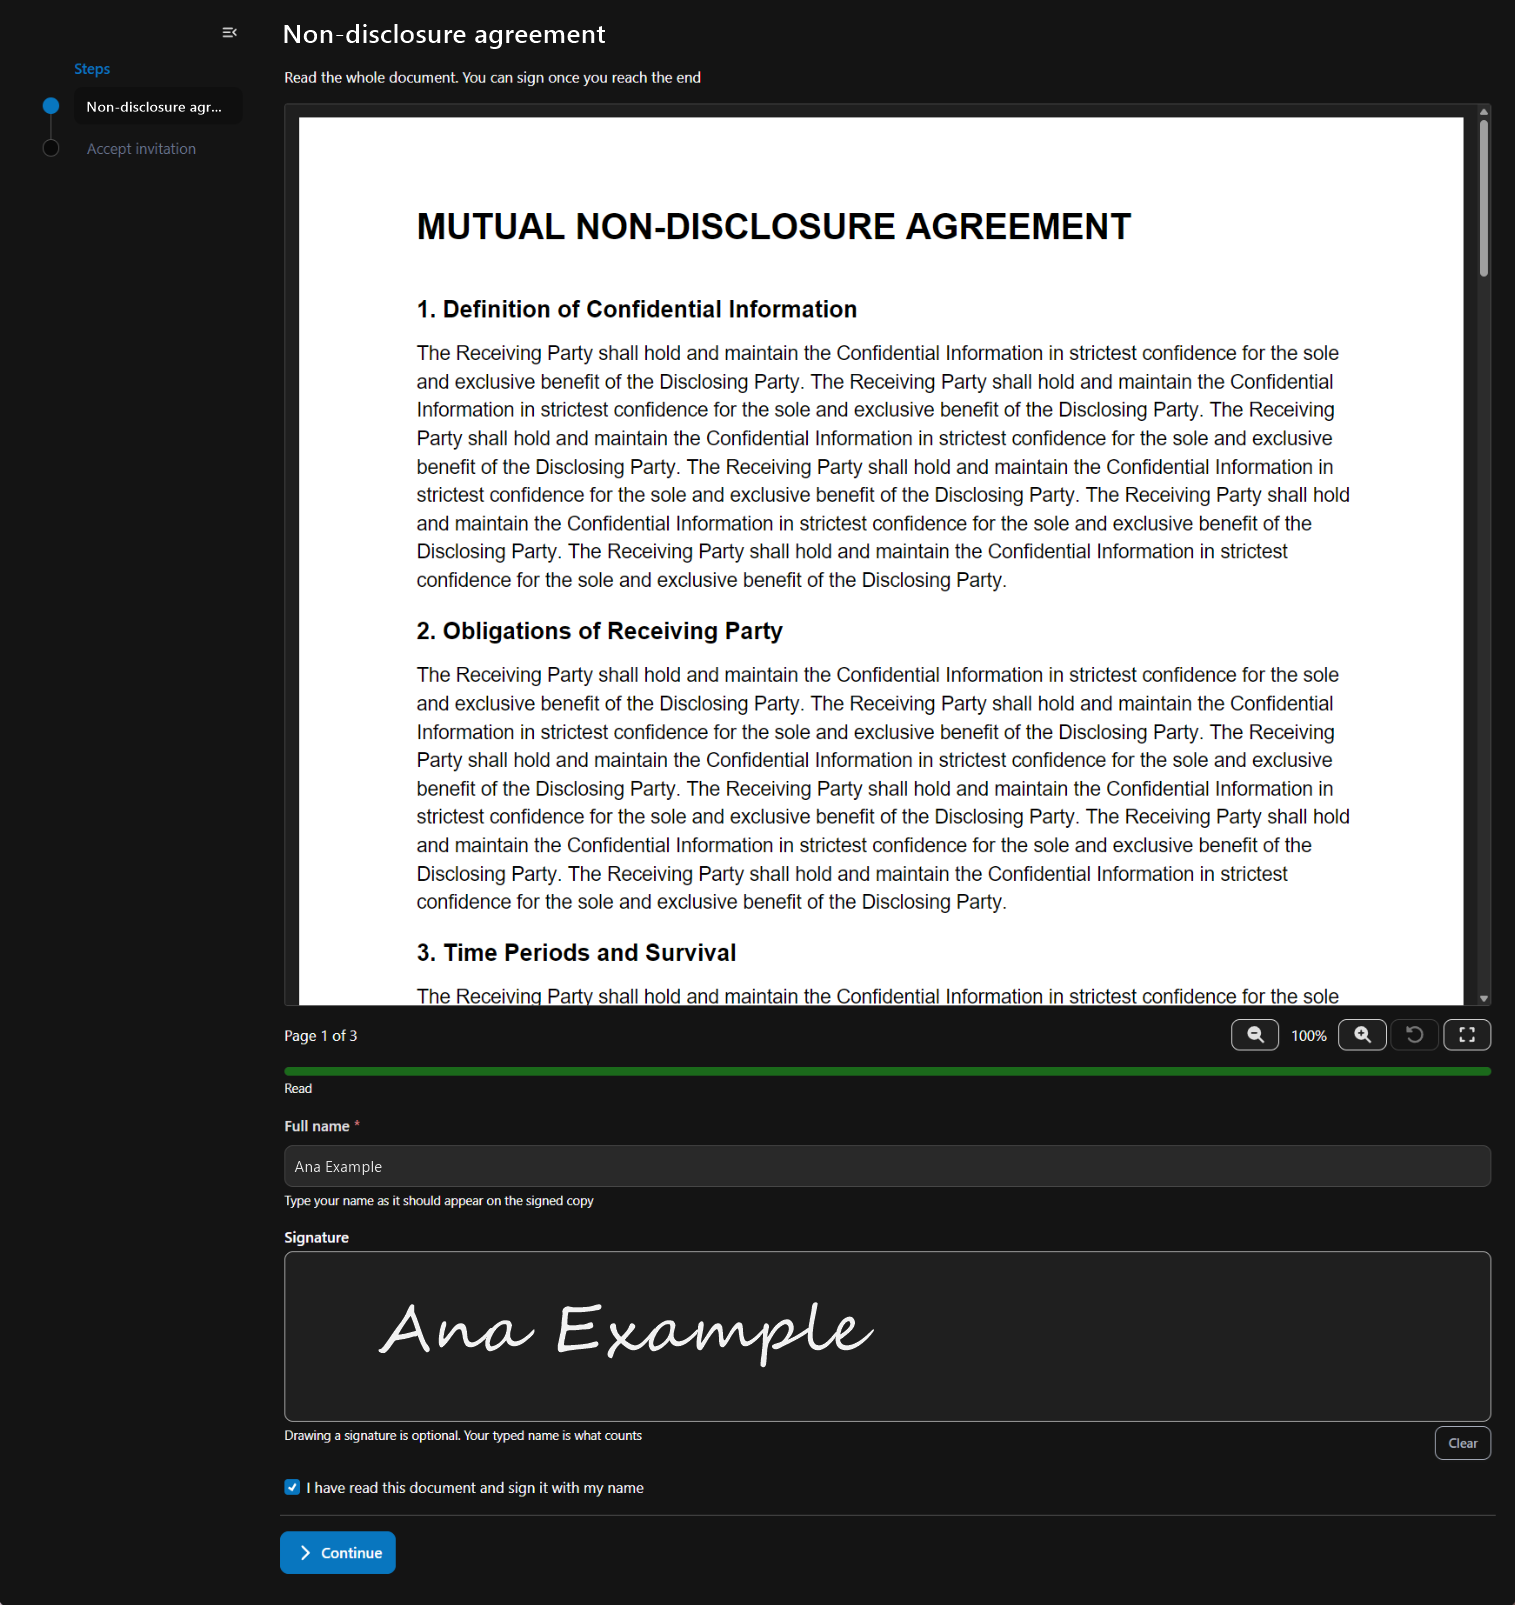
4. Done
The guest sees your success page and accepts the Microsoft invitation. From now on they have access like any other guest.
Create a guest portal
Open Guest portals in EasyLife 365 Admin Insiders and select Create new.

Then go through the sections on the left:
-
General: give the portal a title (guests see it) and a footer, such as your company name or where to ask for help. Turn the portal on with Active when it is ready.
-
Welcome page and Success page: what the guest reads before the first step and at the end.
-
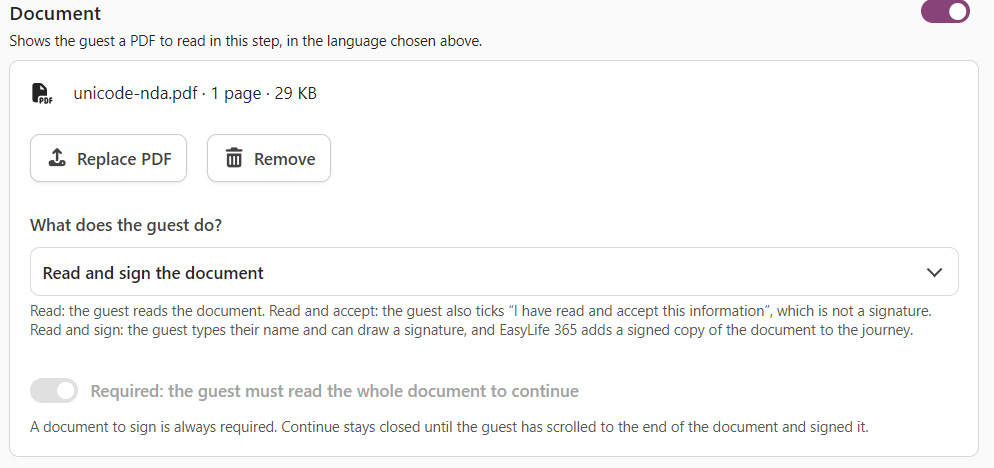
Steps: add the steps the guest goes through. Each step has a title and can have a description and a document. For a document, choose what the guest does with it: Read the document, Read and accept the document, or Read and sign the document.
-
Emails: keep Use tenant guest portal emails to send the portal emails set under Settings → Guest accounts, or choose Portal-specific to give this portal its own sender, look and texts.
-
Signed documents: who gets a copy of each document the guest signs. See The signed copy.
Every text can be written in each language of your portal.
Start using the portal
Under Settings → Guest accounts, set Default invitation method to your guest portal. Every guest template then invites through it. A guest template can also choose its own portal, so you can have a different journey for partners, suppliers or students.
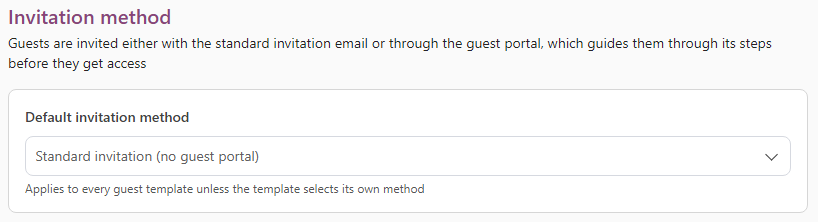
Under Guest portal emails on the same page you set who the portal emails come from and how they look.
The signed copy
When a guest signs a document, EasyLife 365 adds a page to the end of it that records who signed and when: the name the guest typed, their email address, their drawn signature and the time. The signed copy arrives as a PDF attachment:
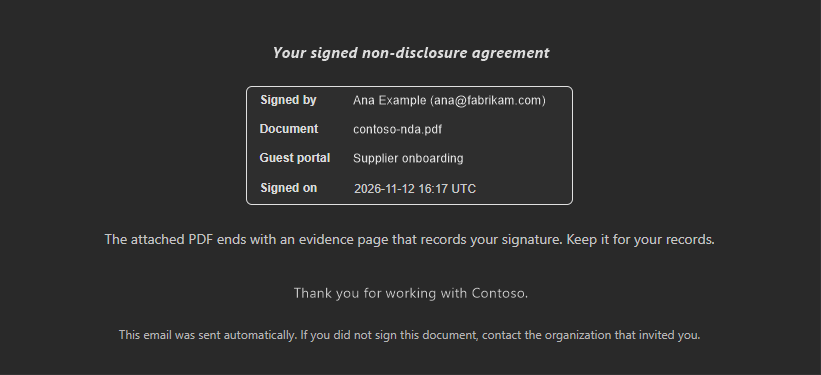
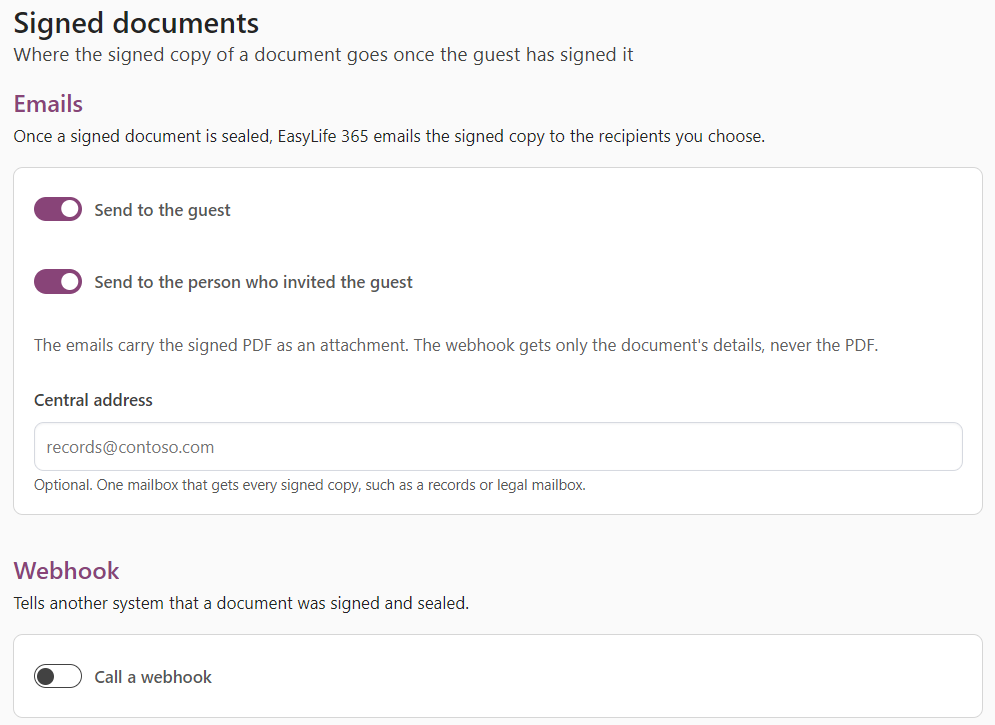
On the Signed documents section of the portal, choose who gets the signed copy by email:
- Send to the guest: the guest keeps a copy of what they signed. You can write the text of this email yourself.
- Send to the person who invited the guest.
- Central address: one mailbox that gets every signed copy, such as your records or legal team.
You can also let another system know that a document was signed, with a Webhook (see For developers).
Follow your guests
In Manage → Guest Accounts, open a guest who was invited through a portal. You see where they are in the journey, and the documents they signed with who got a copy.
- If a guest lost their email, select Resend portal invitation to send a new link.
- If a copy did not arrive, select Send again next to it.
Good to know
- A portal link is valid for 30 days, and a journey for 90 days. A guest who does not finish in time can be sent a new journey.
- The signed copy records a signature; it is not a qualified electronic signature.
- EasyLife 365 keeps the signed copy for about 90 days after the guest's journey. Keep the copy you receive by email if you need it longer.
- Existing guests and the standard invitation are not affected.
For developers
The webhook of a portal receives the details of each signed document, never the PDF itself:
{
  "eventType": "guestDocumentSigned",
  "tenantId": "00000000-0000-0000-0000-000000000000",
  "experience": { "key": "…", "name": "Supplier onboarding" },
  "sessionKey": "…",
  "stepKey": "…",
  "evidenceKey": "…",
  "documentSha256": "…",
  "sealedSha256": "…",
  "signedUtc": "2026-11-12T16:17:02Z",
  "sealedUtc": "2026-11-12T16:17:16Z",
  "guest": { "name": "Ana Example", "mail": "ana@fabrikam.com" }
}
documentSha256 and sealedSha256 let your system check that a copy it receives by email is the one that was signed. See also Webhooks Overview.